“Is it worth painting oak kitchen cabinets?” is one of the questions Google shows right next to this search. It is worth it when the boxes and doors are solid and you want a new color without replacing them, and not when the cabinets themselves are failing or you would miss the wood.
Painting oak cabinets well takes seven steps: test a door for bleed, take everything apart, degrease and scuff-sand, decide on the grain, prime to block stains, paint the boxes and frames, then apply thin finish coats and let them cure for weeks. The decisions inside those steps shape the result more than the brand of paint.
Is painting oak cabinets worth it?
Painting makes sense when the cabinet boxes are sound, the doors are flat and tight, and the layout works for you. In that case paint changes the look of the kitchen while the cabinetry stays where it is.
Think twice in three situations:
- the sink base or other boxes are swollen or soft from water damage, which paint will not fix;
- doors are warped or the veneer is lifting;
- you like the oak and want to keep a wood look, since a painted finish is hard to take back to bare wood.
Decision table: grain, primer, sheen and where the doors get painted
| Decision | Option A | Option B | Choose A if | Choose B if |
|---|---|---|---|---|
| Grain | Leave it visible | Fill it before priming | You like texture, or want a painted cottage look | You want a smooth, factory-style surface |
| Primer | Stain-blocking primer | The primer listed on your enamel’s data sheet | The test door bleeds, or you don’t know the old finish | The test door stays clean after drying overnight |
| Sheen | Satin | Semi-gloss or gloss | You want softer reflections that hide small dents | You want the most wipeable surface and accept that it shows every flaw |
| Application | Spray | Brush and roller | Doors come off and can be finished flat, out of the dust | You are working in place, or on a small number of pieces |
| Back to full use | Gentle use for the first weeks | Full use right away | Always: the enamel keeps hardening for weeks | Never with a fresh enamel finish |
Sherwin-Williams’ sheen guide lists cabinets among the surfaces for gloss and high-gloss paint and notes that high gloss can create high glare. Satin is the middle road many homeowners choose for doors that get touched every day.
What you need before you start
- painter’s tape, a marker and small bags for numbering doors and hardware;
- a degreasing cleaner, rags and clean water;
- fine sanding sponges, and a vacuum or tack cloth for the dust;
- grain filler and a putty knife, if you choose a smooth surface;
- a stain-blocking primer, or the primer named on your enamel’s data sheet;
- a cabinet-grade enamel in the sheen you chose;
- a nylon/polyester brush and a short-nap roller, or a sprayer;
- drop cloths and somewhere flat and dust-free for doors to dry.
Step 1: Test one door for bleed before you prep the whole kitchen
Take the least visible door, clean and dull the back of it, prime it, and let it dry overnight.
Yellow or brown spots and streaks coming through the primer mean the wood or the old finish is bleeding, and the whole kitchen needs a stain-blocking primer. White and light colors show bleed the most, so test before committing to a white kitchen.
Paint makers treat this as a known problem. Benjamin Moore’s data sheet for Advance waterborne alkyd, an enamel it recommends for cabinets, lists “bleeding woods” among the difficult substrates that call for a specialty primer. One door tells you which camp your kitchen is in before you commit every door to it.
Step 2: Take everything apart and label it
Remove doors, drawer fronts, hinges and pulls. Number each door on a piece of tape where the hinge will cover it, and bag the hardware for each door with the same number. Rehanging each door in its original spot, on its own hinges, makes the gaps much easier to line up again.
Step 3: Degrease, then scuff-sand
Kitchen cabinets carry cooking grease, especially near the range and around the pulls, and paint will not hold on it. The Advance data sheet asks for surfaces that are clean, dry and free of grease and other contaminants, says glossy areas should be dulled, and notes that abrasion by sanding gives the best adhesion.
Clean every face with a degreasing cleaner and rinse. Then scuff-sand with a fine sanding sponge until the old finish loses its shine, and remove all the dust. The goal is to give the primer something to grip, not to strip the wood.
Step 4: Decide on the grain: leave it or fill it
Oak is an open-grain wood: the pores you can see and feel run the length of every door. Paint does not hide them. It follows them, so a painted oak door still shows its grain, just in one color.
For a smooth surface, fill the grain after sanding and before priming. Spread the filler across the grain so it packs into the pores, let it dry, and sand it flush. Try it on the back of the test door first and look at it in raking light before you do the rest.
Step 5: Prime with a stain-blocking primer
Use the primer your test door pointed to, on every face that will be painted, including edges and the backs of doors. Follow the primer’s label for drying time before the first finish coat, and lightly sand any raised grain or dust nibs once it is dry.
Where the old finish was oil-based or glossy and you are not sure the primer will stick, the same Benjamin Moore data sheet says to sand glossy alkyds before applying the enamel.
Step 6: Paint the boxes, face frames and edges in place
While the doors dry, the cabinet boxes get the same treatment where they stay: degreased, scuff-sanded, primed and painted. Mask the walls, countertops and the inside of the boxes if you are not painting them, and work from the top down so drips land on unpainted areas.
Brush the inside corners and the edges of the face frames first, then roll the flat faces while the brushed paint is still wet. Do the exposed end panels and the toe kicks too: those are the spots that give a rushed job away.
Step 7: Thin finish coats, then wait for the cure
Dry is not the same as cured. The Advance data sheet says to apply one or two coats with a nylon/polyester brush, a roller with a short cover, or a sprayer. On a door laid flat, two thin coats level better than one heavy one.
Plan the days around the cure, not just the drying. These are the times the same data sheet gives, measured at 77 °F and 50% relative humidity:
| After the coat | What the data sheet says | What it means in your kitchen |
|---|---|---|
| 4 to 6 hours | Dry to the touch | Doors can be handled carefully by the edges |
| 16 hours | Ready to recoat | The second coat goes on the next day, not the same afternoon |
| At least 5 to 7 days | No heavy abrasion; shelves and tabletops back to service | Rehang doors, but go easy on hinges, pulls and stacked dishes |
| Up to 30 days | Optimum hardness and final sheen | Full, everyday use, and the time to judge the final look |
Humidity stretches all of those numbers: the data sheet notes that high humidity or cooler temperatures prolong dry, recoat and cure times, and it sets a minimum surface temperature of 50 °F for application. In a Charleston summer, plan on the longer end.
One more note from the same sheet matters for white cabinets: a slight yellowing may occur with this type of enamel, faster in dark or poorly ventilated areas and more visible in lighter colors. Ventilation during and after the job helps.

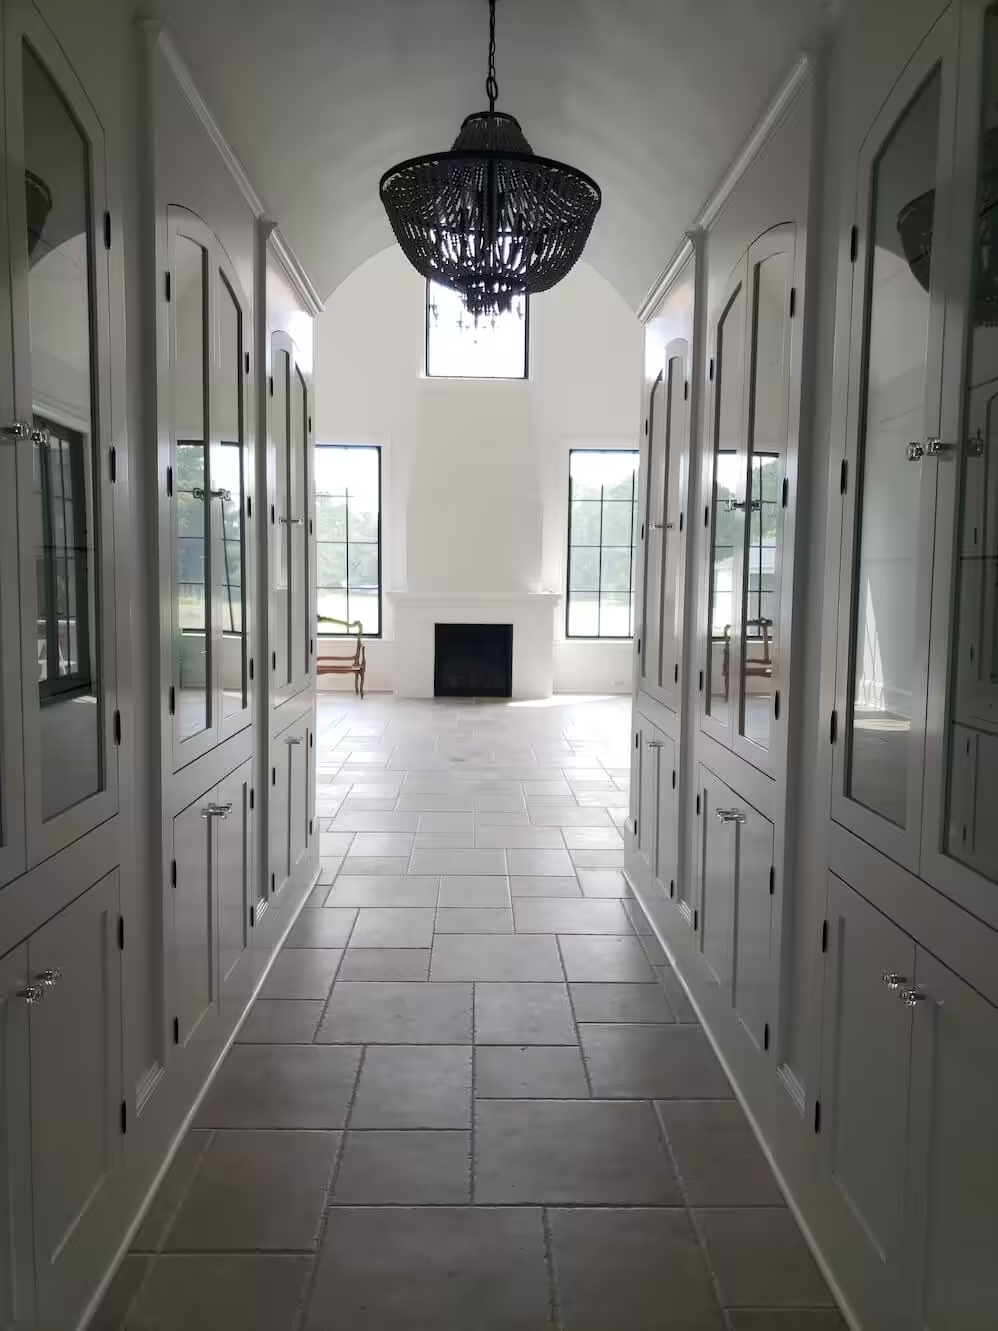
This is what the end goal looks like on built-in cabinetry: hallway built-ins with glass-front doors, painted bright white during construction of a modern farmhouse in Mount Pleasant. The project page does not record the wood species, so treat it as an example of the painted finish, not of oak.
Kitchens in older Charleston homes: the lead question
If your cabinets were painted before 1978, the old layers may contain lead, and sanding them makes dust. The EPA’s Renovation, Repair and Painting Rule requires anyone paid to disturb paint in a pre-1978 home to be certified in lead-safe work practices.
The rule generally does not apply to homeowners working in their own homes, but EPA recommends hiring a certified contractor for this kind of project. The question is about old paint layers, so it matters most for cabinets that were painted before 1978.
When to hand the job to a cabinet painter
A kitchen full of doors and drawer fronts, a smooth sprayed finish as the goal, or a household that can’t live without its kitchen for long are the usual reasons to hire it out. VMS Home Painting offers cabinet painting and refinishing as one of its services across the Charleston area.
What a cabinet painting price depends on: the number of doors and drawer fronts, their condition and any repairs, whether the grain is filled, the size of the color change, the sheen and product, and whether doors are finished off-site or in the house.
If you would rather not take on the seven steps above, see our kitchen cabinet painting in Charleston and request a free cabinet painting estimate.